There and Back Again Bag

20181208_124340.jpg

20181208_124455

20181208_124631

20181208_124724.jpg

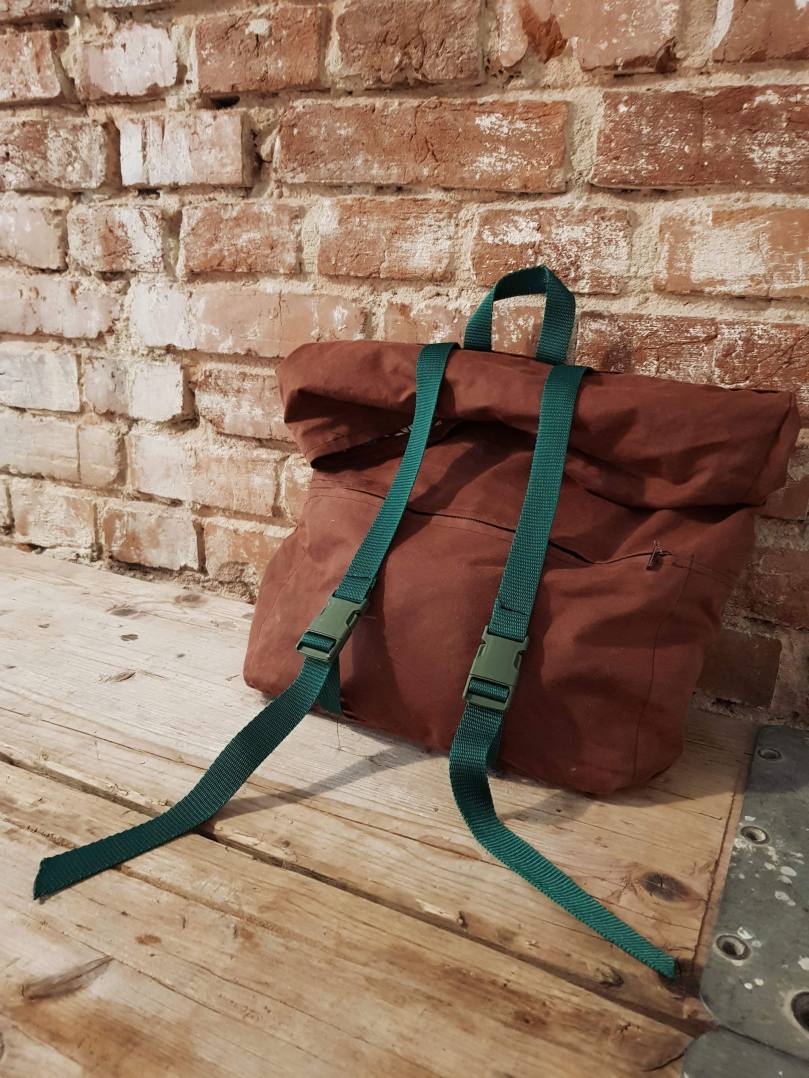
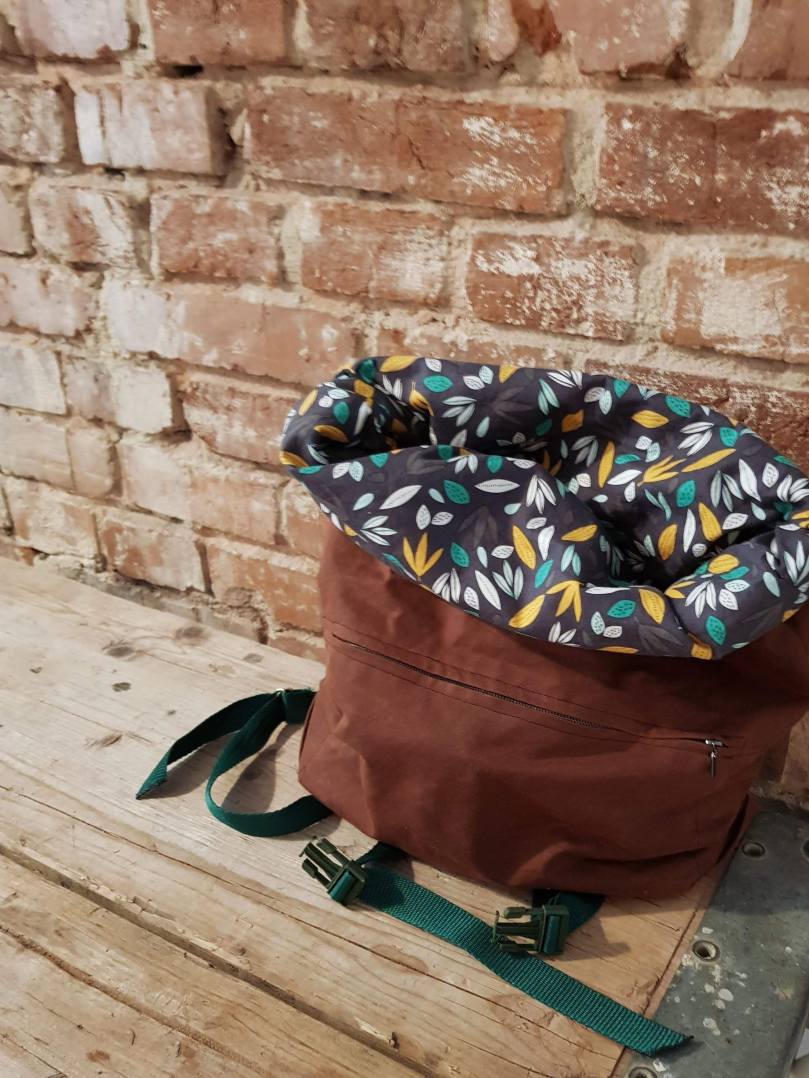
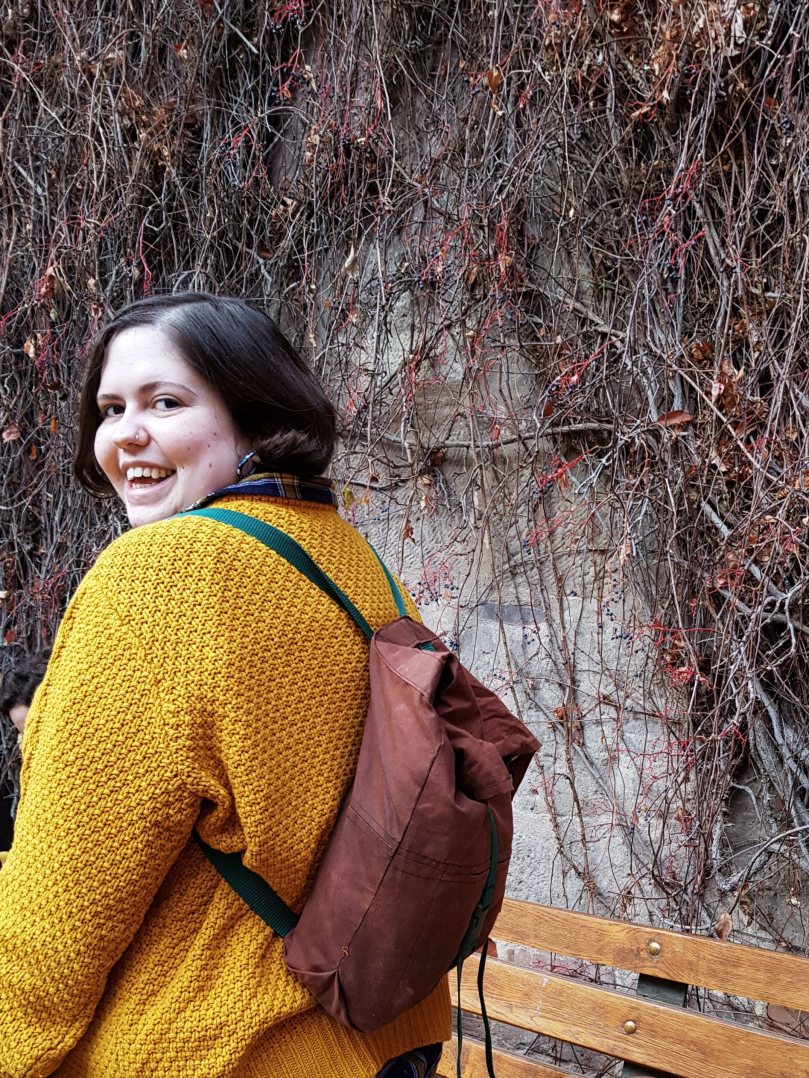
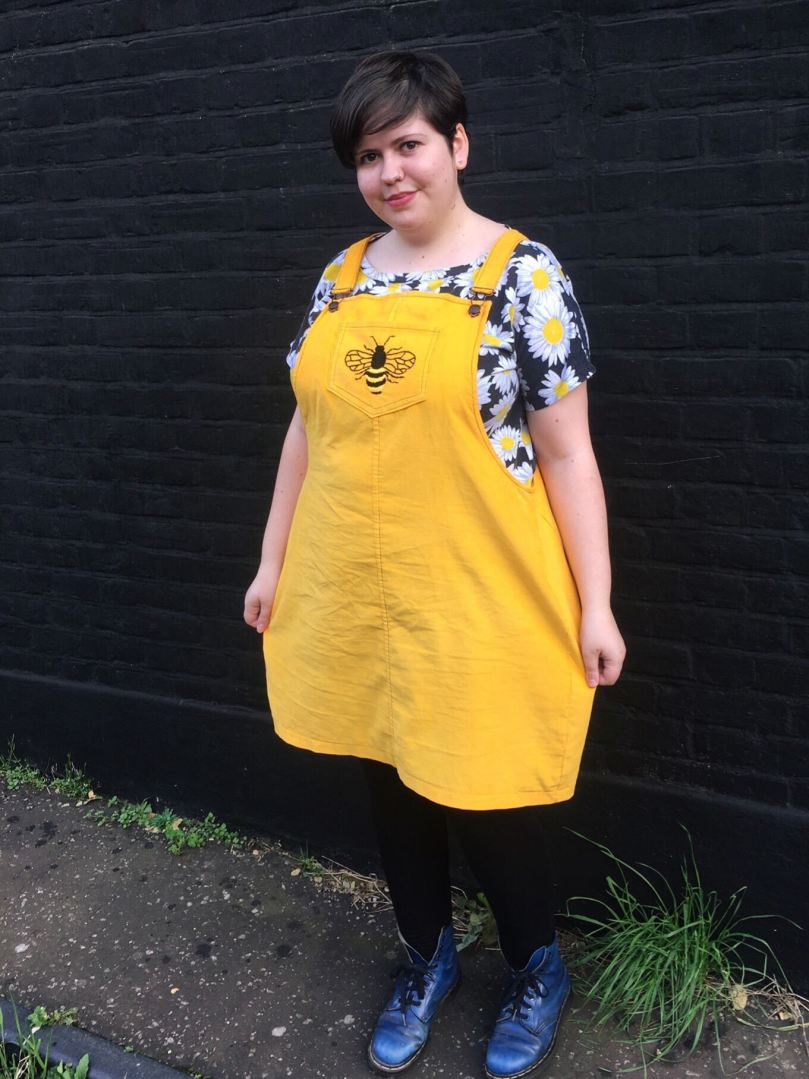
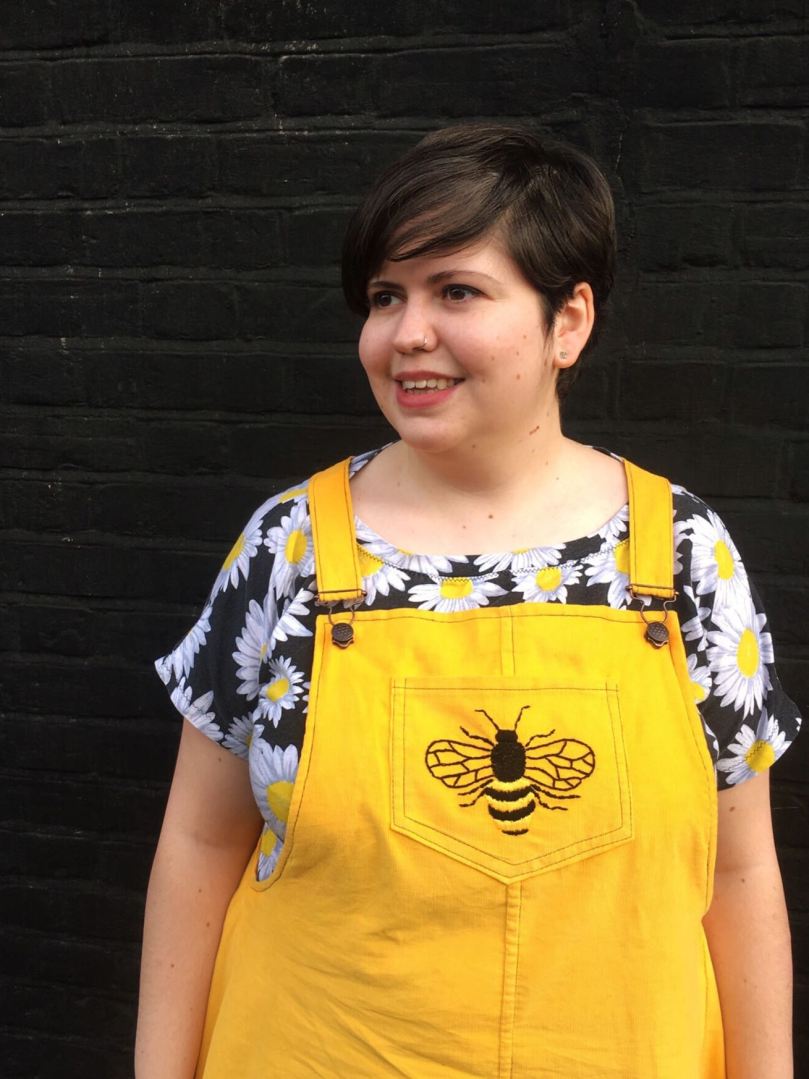
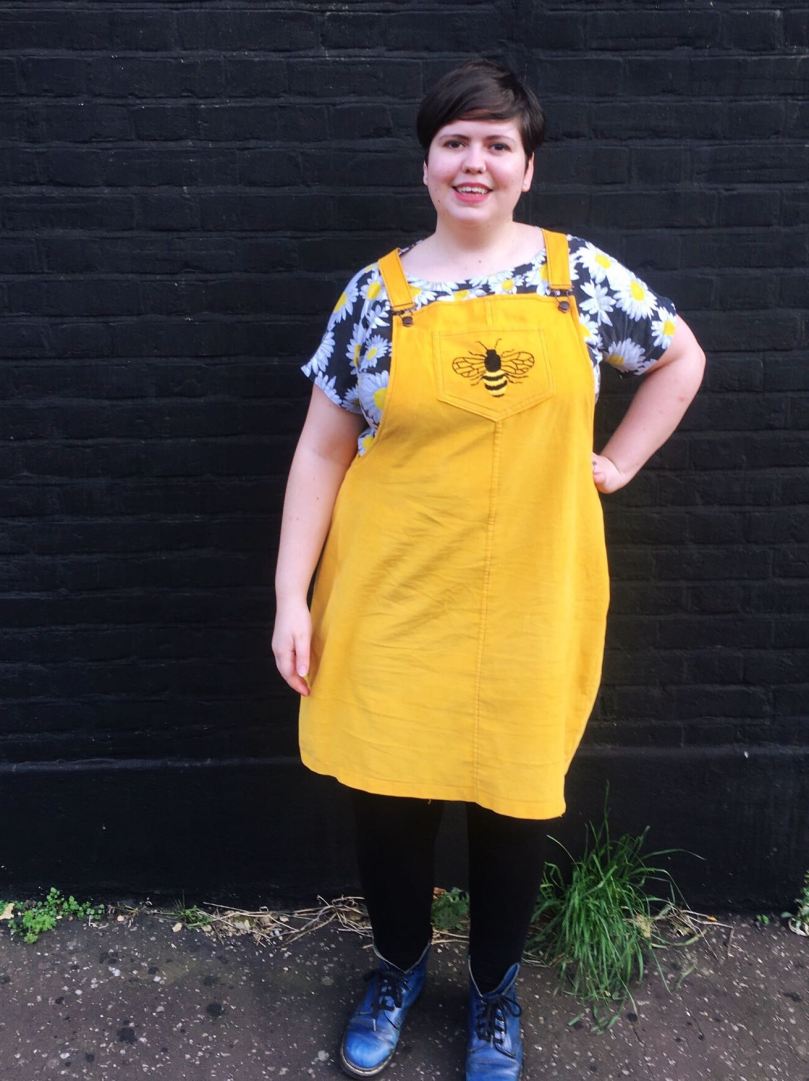
This is the Atlas rucksack by Swoon Patterns, made in a brown waxed canvas with forest green straps and a patterned cotton lining. I got most of the supplies from ebay apart from the cotton for the lining, which I bought from the haberdashery section of Jarrolds in Norwich. As soon as I’d made it, I realised that the colours I had chosen made it look like a backpack that a hobbit would have worn in the Lord of the Rings, so I named it my “there and back again” bag as I made it for travelling.

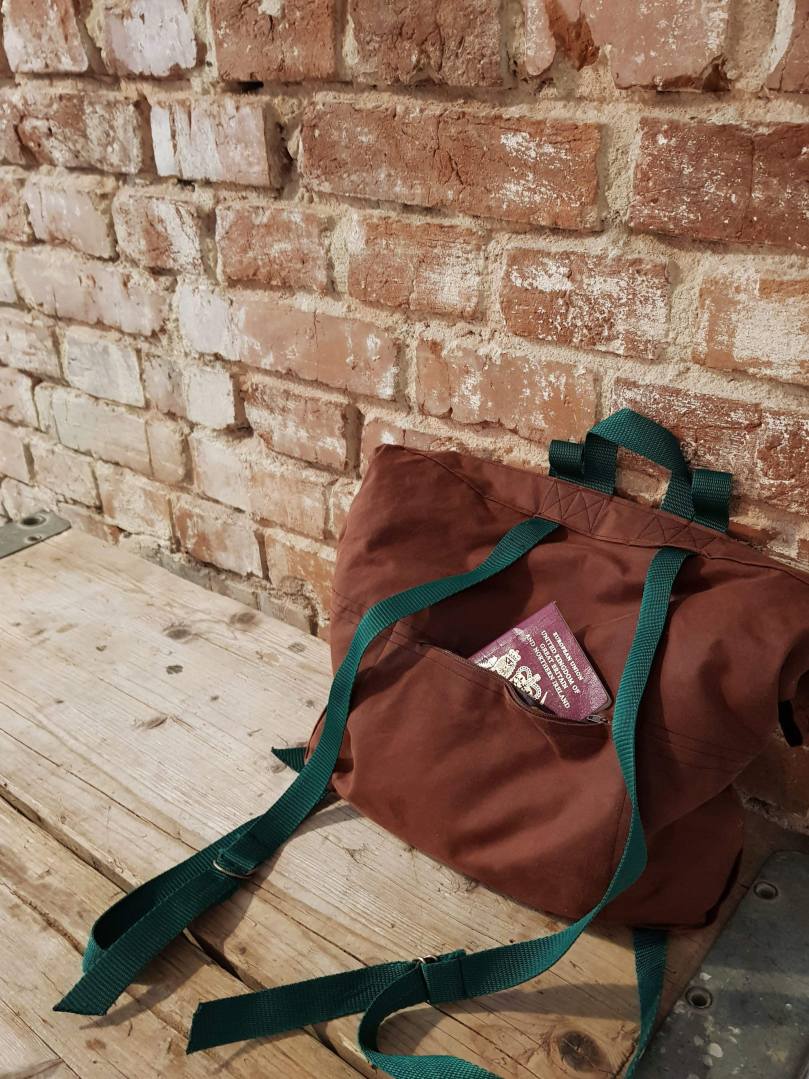
I made a bunch of adjustments to the pattern including adding batting to the back to make it more comfortable, adding two fabric inner pockets and adding a hidden pocket in the back. The hidden pocket in the back was an idea that I borrowed from Lladybird when she made a travel backpack, it’s perfect for putting your passport or cash in to protect it when traveling. I made it using the same instructions as the pocket on the front but made it slightly smaller.

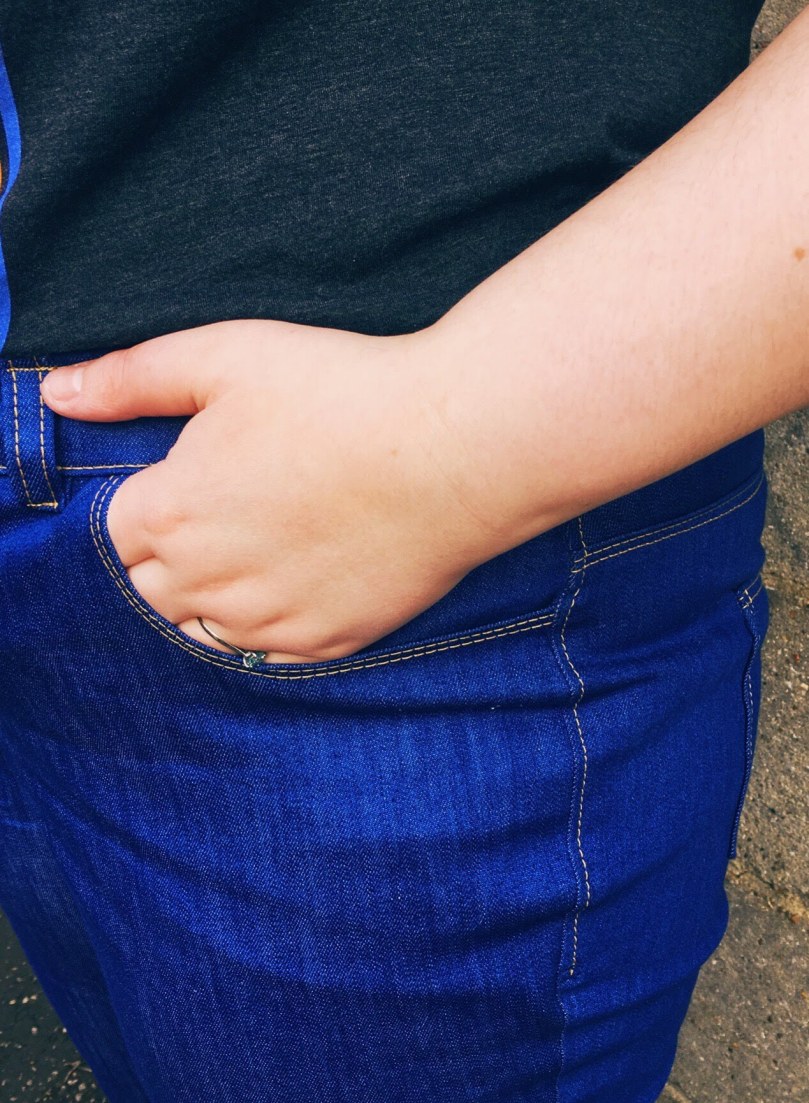
I originally used a zip from my stash for the front pocket, but after using it for a bit I decided that the zip pull was too fiddly especially when I needed to get my purse out quickly. So I bought a new zip with a chunkier zip pull but in order to replace that I had to take the whole bag apart! When I was replacing the zip I also moved the straps closer together, as I have quite narrow shoulders and the straps kept falling off them.

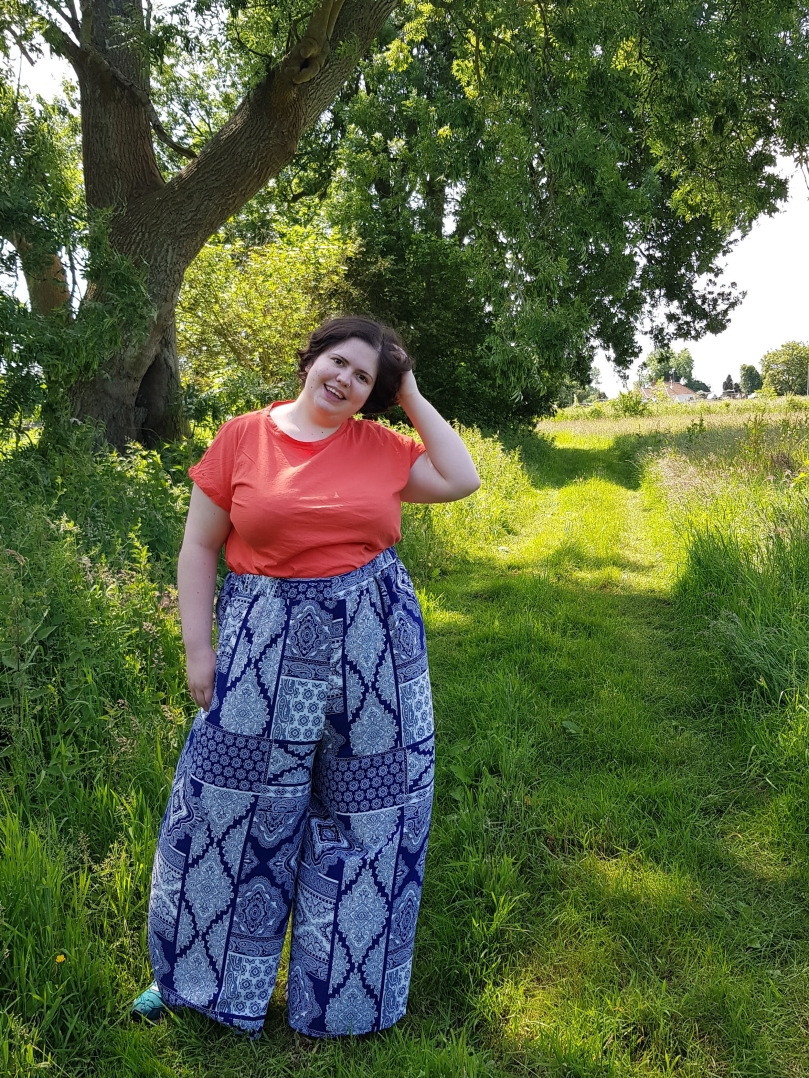
With these adjustments, I was satisfied with the bag, I’ve been using it for a few months and took it on a recent trip to Nuremberg. I love the waxed canvas and I really enjoyed making the bag. However, I just don’t get along with the roll top, I find it much more annoying to get things out of than a bag with a zip. I was planning on taking this bag with me when I go on a big trip to Japan next year, but I think I will take another bag instead.

Helen’s Closet Winslow Culottes

20180613_103956.jpg

20180613_103801

Recently, I discovered these photos, which I hadn’t blogged! I made these Helen’s Closet Winslow culottes on my birthday, in preparation for going on holiday (the same holiday as these photos) and they were perfect for chilling out in a yurt.

I made these trousers using the elastic waist hack from the Helen’s Closet blog, and they were super quick to make. The fabric is a woven viscose from The Textile Centre which I bought on a whim a year or so ago. I bought the fabric with some breezy trousers in mind, so the Winslow pattern was perfect. I have some of the fabric left so I might make a woven t-shirt out of it at some point.

I’m on a bit of a Helen’s Closet kick at the moment, I really like the style of the patterns and they are well drafted with easy to follow instructions. As well as these trousers and the Suki robe, I sewed a York Pinafore at the Sewing Weekender, I’ve also sewn two Blackwood cardigans, and got a third cut out!

The Sewing Weekender

the-sewing-weekender-banner

Last weekend I attended the Sewing Weekender run by English Girl at Home and The Fold Line in Cambridge. It was a two-day event that consisted of sewing, chatting, drinking tea, listening to talks and eating food!

20180831_192821.jpg

When I go there, I was greeted by an awesome goody bag, I love the bag itself (it has become my new motto!) and inside there were lots of awesome stuff including sewing magazines and some patterns which I can’t wait to make. Then we had a chance to have a cup of tea and chat with people before starting our sewing for the day. I was sewing a Helen’s Closet York pinafore, which was an easy but fun sew.

20180825_113224.jpg

In the morning, I attended a workshop by Spoonflower where I learnt how to make a repeating pattern by hand. I made a design cut from paper inspired by some beetroot the tutor bought in. It was such a fun activity and I’m definitely going to make some more! I had a go at scanning it and uploading it to Spoonflower, which you can check out here. I think I need to have another go at scanning it because the colours were not as bright as in the photo, but it was so neat to see how well the repeating pattern worked!

20180825_142714.jpg

After a delicious lunch at the Cambridge college, we had two talks. The first one was by Sheona McMahon of Sewisfaction, where she talked about how she runs her sewing business. It was really interesting to listen to the thought process that goes behind choosing which fabrics they sell.

20180825_144842

The second talk was by Frances Tobin of The Maker’s Atelier about the evolution of sewing patterns and magazines. I love talks which cover the history of sewing and found it so fascinating how the different sewing magazines evolved. Frances Tobin was such an engaging speaker and I really enjoyed hearing about how she developed her personal style.

In the afternoon there was more sewing (and chatting!) before heading to a nearby pub for dinner. After talking about sewing all evening, I headed to bed as I had an early start to get the train to Cambridge and I wanted to be nice and rested for the next day.

20180826_092505

On Sunday I woke up bright and early (it felt like Christmas! Sewing Christmas!!) and headed to the college canteen for breakfast. Then it was time to sew again, as I’d finished my pinafore the day before, I grabbed some scrap fabric from the swap table and made a couple of drawstring bags, as they are always useful to have around.

20180826_100940

After sewing we a talk from Karen Ball from Did You Make This who was talking about publishing a sewing book. It was super interesting to hear about the publishing industry from a sewing point of view, and how now is a good time to pitch a sewing book!

20180831_190742

We then had a talk from Harriet Johnson of the Clothing Care co, who I completely forgot to take a picture of, but did an awesome talk about caring for your handmade clothes. I also bought her book on stain removal, which I know will come in handy as I have a reputation for spilling food down myself!

After that, it was unfortunately, time to go home. I had an excellent two days, and the highlight was definitely getting to meet so many wonderful fellow sewists. It was so much fun chatting about sewing all weekend, and I left very inspired having seen everyone’s makes and the lovely clothes they were wearing!

New Look 6262 Again!

20180721_16150320180721_153238

20180721_152812

Last August, I finished the Computer Science MSc degree I was taking, and as I finished after that year’s graduation ceremony, I graduated this year instead. I’ve been working as a software engineer since, and I can’t believe almost a year has passed since I started my job. I had a lovely day with my parents and my grandmother, although, as we’re currently having a heat wave in the UK, it was really hot. (Side note, you can tell how hot it is by comparing the colour of the grass in these photos, to the ones in the same spot last year!)

For the occasion, I sewed a New Look 6262 bodice with a self-drafted half circle skirt. I love adding half circle skirts to previously tested bodices, I think they’re a quick way to make a dress pattern go further, and are really flattering to wear. I’ve done this before (in an un-blogged make) on the Colette Moneta dress to make a velvet dress to wear to a winter wedding. For this dress, I guessed how long I would want it to be, and then shortened it once I had constructed the dress. I also narrowly avoided a disaster with the skirt, as I forgot to take into account the darts when measuring the bodice pattern pieces for the waist circumference (I know, rookie error!). In the end, I ignored the measurements because they didn’t seem right, and somehow ended up with a circumference that was the exact right size! I am still thanking the sewing gods for that stroke of luck.

The fabric I chose for this dress is a stretch cotton from The Textile Centre (but I think it’s no longer available). It was a little heavier than I hoped, knowing that I would have to wear it under a polyester gown on a very hot day. However, the elastane content helped the fit, and when I wore it yesterday to a wedding, it wasn’t too hot.

For the alterations, I added pockets and used the same full bust adjustment as I did on my previous New Look 6262. However, I also did a small rounded shoulder adjustment, added some extra room in the front of the bodice and used bias binding rather than a facing to finish off the neckline. There are some fit issues on the back of the dress, possibly due to my invisible zip skills, which I need to take some proper pictures to diagnose. However, I already have a second dress cut out so the adjustments will have to wait. Despite the adjustments, I do love the 6262 bodice pattern.

When it comes to finishing the dress, I used French seams throughout, except for part of the pockets and the zip, to avoid too much bulk. I really love French seams, even though they take a little longer, you are still only sewing the seams twice, which is comparable to finishing it with a zig zag stitch (or an overlocker, but I don’t have one yet). They are also a great way of ensuring the garments will last a long time. I also finished the neckline and the hem of the skirt by hand to make sure the stitching wasn’t visible from the outside. As the skirt was a half circle, it took me a long time to press and hem, I think two and a half hours in all, but it was worth it for the finish. As I am so proud of my French seems, I will leave you with a bad picture of the insides of the dress!

20180722_131857

Helen’s Closet Suki

20180616_11575720180616_11584020180613_195545

It was my birthday last Monday, and as a birthday present to myself, I made a Helen’s Closet Suki robe. It used some cotton lawn from Abakhan which is absolutely gorgeous but now sold out, I wish I’d bought more so I could make myself a dress as well!

I really enjoyed making this pattern, for the sleeve cuff and the collar there are two methods of sewing described in the instruction booklets. I chose the more difficult, concealed seam methods, and alongside using French seams for the rest it meant that my robe has no exposed seams! I love finishing fine fabrics with French seams, it gives a beautiful finish and prolongs the life of the garment. My measurements fit into the largest size, which I made, but even with the inner tie, the robe had a habit of falling open, so I added a hook and eye in the front to make sure that didn’t happen.

This robe is great for lounging around in on the weekends, the cotton lawn I used is lightweight but not sheer at all. I took these pictures on holiday last week, we were staying in a yurt in a gorgeous meadow, which was the perfect spot for taking pictures!

Cashmerette Ames Jeans

ACS_0003ACS_0002ACS_0006ACS_0005ACS_0004

Folks, I made jeans!! These are the Cashmerette Ames jeans, made using some stretch denim from my local fabric shop. I made them using the Cashmerette online jeans sewing course and it made the whole process so easy, I was worried about using denim in my sewing machine, but the course was filled with tips to make it easier. I bought the course because I understand the process making things so much more easily by watching a video rather than looking at picture instructions. The video course made all the tricky bits, like sewing the fly front, a breeze.

Despite jeans being the most difficult thing I’ve sewn so far, these only took me a week to complete. My partner was away last week for work, so I spent the evenings sewing. The downside was that some of the fitting parts (such as the placement of the pockets) which needed a second opinion or someone to take photos, I had to do by myself. So on the next pair I make, I’ll adjust the placement a bit more. However, I wanted to get these jeans finished today so I could take part in the Curvy Sewing Collective’s #CurvyYearOfSewing challenge, which is Jeans and Trousers for January and February. I was also really inspired by Closet Case Pattern’s #NoFearNewJeans challenge on Instagram, even though I’m not making Closet Case Pattern’s jeans.

Before I made these, I made a toile in a cheap stretch denim. As the Ames jeans pattern comes with two different shapes, apple and pair, I figured I would be an apple, so I made the toile using that pattern piece. However, when I tried it on, I had some gaping at the back, so I switched to the pear pattern pieces. I also did a low butt adjustment after looking at the drag lines on the toile and using these diagrams from Closet Case Patterns and extended the yoke pattern piece up at the top because I wanted a higher waist. As I was sewing the jeans I also tried them on a few times, I ended up taking the hips in a bit and the bottom of the calves in a lot.

After wearing the finished jeans for a bit, I have a few adjustments I’d like to make in my next pair. There are a lot of drag lines at the front, so I’m going to ask for some help to reduce those. I also think the yoke should start a bit higher up, the waistband is a little loose as it is and I’d like them to have an even higher rise at the back, even skinnier legs and deeper pockets.

My ideal fit is these Lucy jeans from Simply Be, which I’ve been buying and wearing for the last three years. The jeans fit perfectly, but the denim is so thin the inner leg fabric wears through after six months, and can’t really be patched. This is super frustrating and it strikes me as quite wasteful to keep buying the same jeans when I know they’re going to last such a short amount of time.

I took these photos this afternoon, I was super excited about finishing them and I went straight out to take pictures. The t-shirt I’m wearing is from Wicked clothing, I’m really into graphic t-shirts at the moment and I love this design. We’re having a cold snap at the moment, so I tried to take these pictures as quickly as possible, so I wasn’t standing around without a coat for too long!

2018 Make … Four??

collage

I love following Lucky Lucille’s Make Nine challenge, however, last year I only made one on my list of nine. This was mainly because my sewing preferences changed, I stopped wanting to sew with stretch fabric (with the exception of two Monetas that I made last year because I could sew them in my sleep) and most of the sewing projects listed were knit projects. I also completely misjudged how much sweater knitting I would do. So, this year I’ve decided to only list four projects to narrow my focus and hopefully give me a fighting chance to make all of them.

1) Martine Sweater by Julie Hoover. This is sweater knitted in the flat and then seamed together, it’s made in knotted stitch and is for a DK weight cotton yarn. I chose it because it’s designed for a cotton yarn, which I find a lot comfier to wear than wool and because I’ve never sewn a seamed sweater before. I’ve ordered some navy yarn and I’m excited to get started knitting. I’m hoping I can finish it in a few months so I can wear it on cooler spring and summer days, as it’s cotton so it won’t be as warm as wool.

2. Ames Jeans by Cashmerette. I’ve wanted to sew my own jeans for ages because even though I’ve found a ready to wear make of jeans that fit me, the denim they are made of is really thin and always rips within about six months. I’m so excited that Cashmerette have created a jeans pattern and an online course to go with it. I’ve bought some denim for a wearable muslin, but the weather has been so bad here I haven’t been able to pre-wash and dry the denim yet.

3. Kalle Shirt and Shirtdress by Closet Case Patterns. I’ve seen so many variations of the Kalle shirt online and they all look really good, especially now Closet Case Patterns have released a long sleeve expansion. I’d like to make a few long sleeve flannel shirts because they’re so comfy to wear, and also some long shirt dresses that I can wear with leggings.

4. Suki Kimono by Helen’s Closet. I bought this pattern last year when it was on sale but never got round to wearing it. However, I really want to make one in a luxurious cotton lawn for lounging around in the summer. I think it would be such a satisfying make, and so useful as well.

Mustard and Grey Byatt Shawl

IMG_9483IMG_9485IMG_9496.jpg

This is the Byatt shawl by Karie Westermann, which according to Ravelry I finished almost a year and a half ago, but I hadn’t taken any proper photos of it! The yarn is Malabrigo Sock in Playa for the grey and Ba’Tat Rye in Cider for the mustard. The shop I got the yellow yarn from is no longer selling yarn, but the yarn itself is lovely and soft and I love the slightly variegated colour.

I had so much fun knitting this shawl, it was fascinating seeing the section with slipped stitches take place and I really enjoyed knitting the lace section. It’s also sparked my love of asymmetric triangle shawls. The lace also opens up beautifully after being blocked as you can see in the first picture.

This shawl has to be one of my favourite things ever, let alone clothing that I’ve made! It’s so unusual and beautiful as well as being super soft and perfect for the colder months, and mustard and grey is one of my favourite colour combinations.

Causing a Buzz! Tilly and the Buttons Cleo Dress

IMG_9486
IMG_9487
IMG_9488

This is the Tilly and the Buttons Cleo dungaree dress, I started making it back in the spring, but by the time I finished it, the weather was too hot to wear it! It’s made from a yellow babycord I bought from ebay here, which was lovely to sew with. I completely forgot about the knap when I was cutting out the fabric, but luckily I’d cut both the front and the back in the same direction!

I really enjoyed sewing the dress, as the construction was simple I could focus on the small details like the topstitching. I finished the bee embroidery on the front pocket before I started making the dress, which meant that I could attach the pocket at the right time. After I’d started sewing the dress, I found a Singer 127k sewing machine in my local Oxfam shop for £20, after I’d got it home and working again I used it to do some of the topstitching.

The t-shirt I’m wearing is also me made, I got the fabric from the fabric swap at the Sewing Weekender in 2016, and used it to make a self-drafted t-shirt about a year ago. I think it looks cute and a little twee with the bee on the dress!

IMG_8744

Sashiko Clutch

IMG_0044IMG_0043IMG_0042
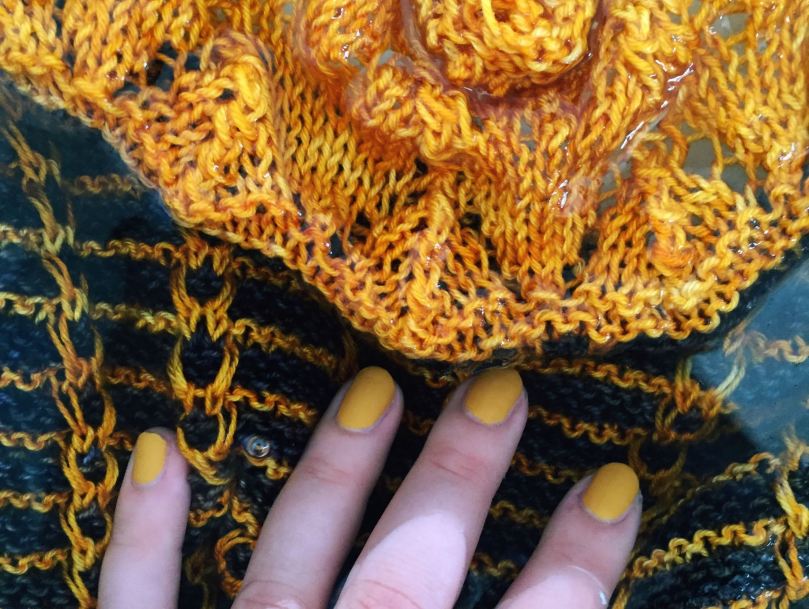
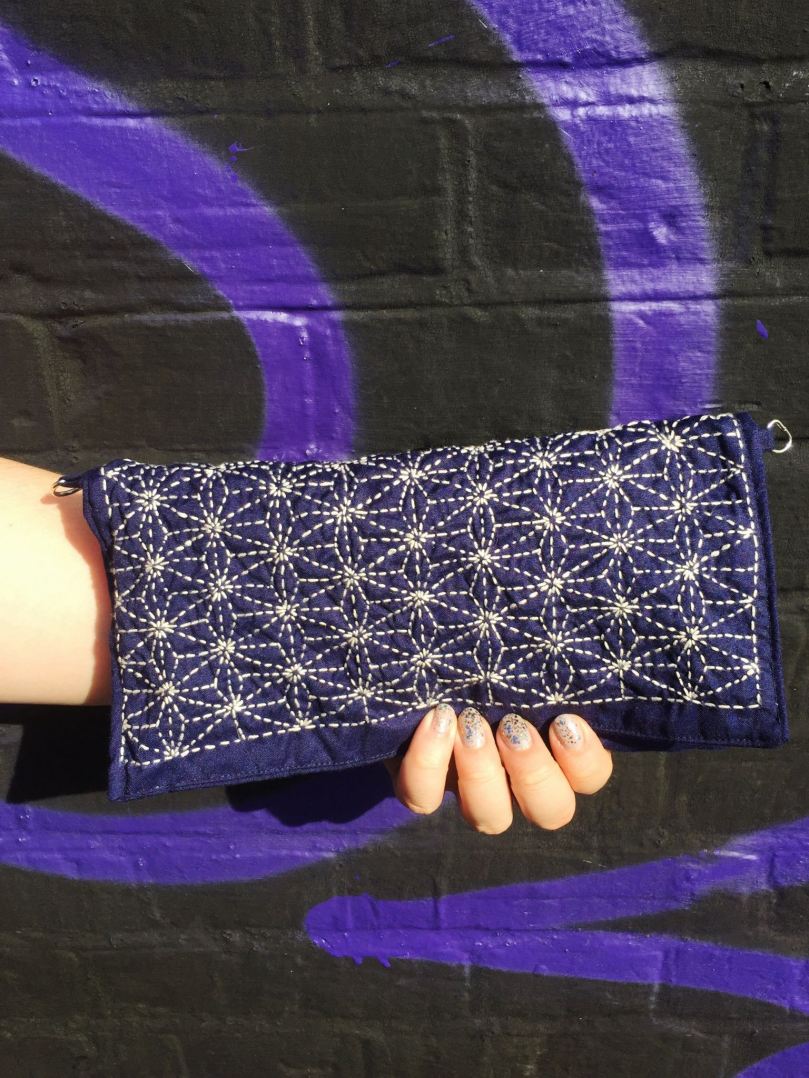
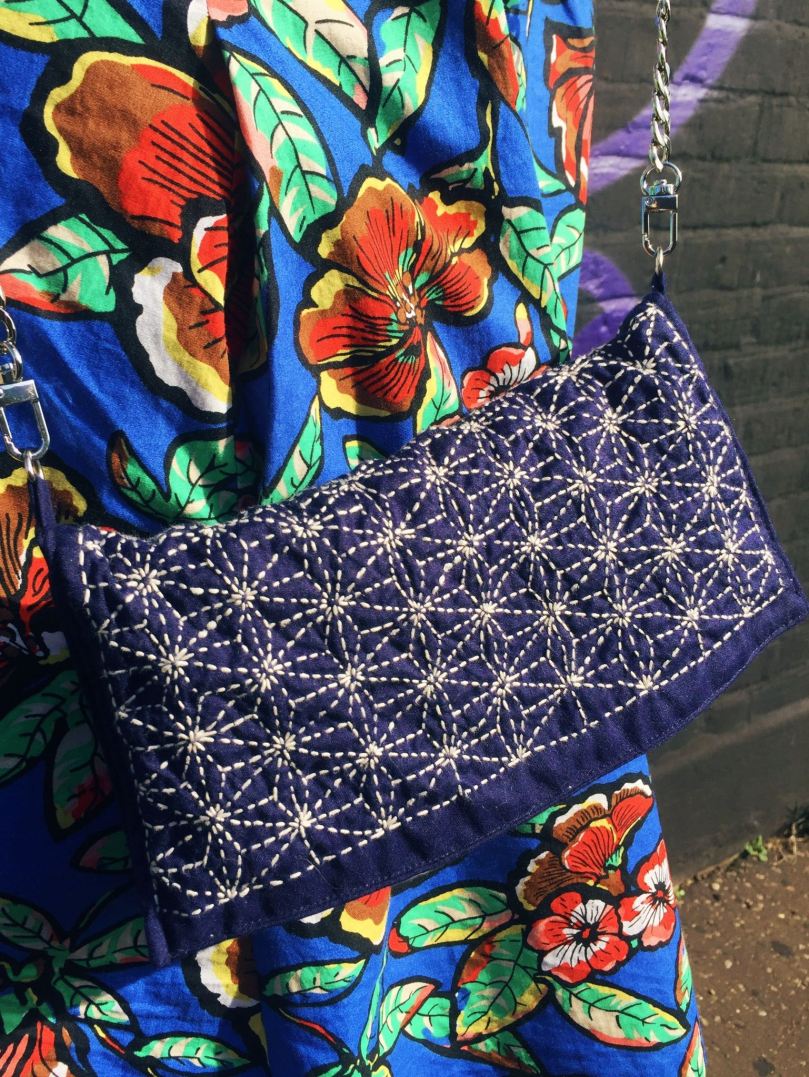
I’ve had a lot of fun recently playing around with sashiko, it’s so much fun to do in front of the tv or on the bus.

This bag is a simple fold over clutch, fastened inside with magnetic clips and with a zip pocket inside. To attach the straps, I sewed on some d-rings and used a clip-on chain that I bought from eBay. The fabric is some dark blue viscose I bought but decided that I didn’t like it enough to make into clothes, but it’s perfect for sashiko as it’s not too tightly woven and looks similar to the indigo fabric used in traditional sashiko. I tacked some cotton flannel fabric onto the back of the fabric and quilted through both layers to make the quilted look more prominent. I used Olympus brand sashiko threads and Clover brand sashiko needles, but I’ve also had good results using a normal embroidery needle and thread.

The sashiko is an ‘asanoha’ design, which means hemp leaf, which I used from Susan Briscoe’s ‘The Ultimate Sashiko Sourcebook’. I really love the book, and I’ve made four or five designs from it so far and they’ve all looked lovely. I really love the meditative art of getting all the stitches a similar size and making sure none of the threads cross. It does take some time initially to draw the grids out, but after that step is done, the sewing is really fun!